Tuesday, June 29, 2010

Craig's List Hutch

I am SOOOOOO excited - I just made my first Craig's List purchase!!!  My husband buys and sells stuff on there all the time, but this is a first for me.  I have been looking for a hutch.  It couldn't be real wide because of the area I want to place it.  I came across this add and immediately contacted the seller to see if it was still available - I was in luck.  Talked to hubby to see what he thought, and then scheduled a time to check it out.  Met with the guy that evening.  The picture he posted (the one below) made it look quite a bit nicer than when I checked it in person.  However, because it had a few issues, I was able to get him to come down on the price... $30!!!  It's solid wood, so I think I got a good deal.  Since I'm planning to paint it anyway, all problems can be easily resolved with a little bit of sanding.  I can't wait to get started on the make over.  Think I'm going to be painting it white and then scuffing it up a bit.  I'll be sure to post pictures of the finished product.

Monday, June 28, 2010

Goodwill Jewels - Project #3

One day as I wandered through one of our local Goodwill stores, I spied a round wood and metal thing.  (I'm not really sure what you would call it.)  I was relatively new to the whole "trash to treasure" thing, so I glanced at it but continued walking around.  I went back and looked at it again, stood there and thought, "I'm sure one of those girls in blog land would think of something really cleaver to do with this - but what could I do?"  (This is the original decoration laying on my carpet.)


I finally turned it over to check out the price and almost knocked over a lady as I turned to put it in my cart!  Check this out.  It had the original price tag still on it...
 

This is the price I purchased it for...


I figured at that price I could find SOMETHING to do with it!  When I was looking for something to put above my toilet in my master bathroom (the toilet is in a separate little room) I pulled it out and thought about what I could do with it.  The first thing I knew I had to do was paint it.  I decided to give it a coat of "Heirloom White" spray paint.  I made sure that the wood on the outside received a fairly good coating of the paint, but I was not as careful about the metal on the inside.  I wanted some of the original metal to show through rather than being solid white.  Once it was dry I tried it above the toilet.  It was pretty, but it really did not add any life to the area and did not stand out on the wall.  I had a nice piece of brown fabric which I was using in my bedroom, so I thought I would see what it looked like behind this round decoration.  I liked the looks of it, so I went ahead and stapled the fabric to the back. 


When I put it above the toilet it brought a lot more life to the wall and I decided I really liked it.  I was SO PROUD of myself that I had taken a $2 (questionable) purchase and had turned it into something I was proud of.  I understand it's not a BIG transformation, but hey... it's a start!!!
 

Saturday, June 26, 2010

Dollar Tree Eggs

Two things I love:
1.  Dollar Tree
2.  Spray Paint

Isn't it awesome to find something that might be considered "junk" (i.e., something you would not be caught dead with in your home), and transform it into something you look at and say, "Isn't that cute?"...???  Such is the case with these little egg boxes I found. 


Beautiful isn't it!??!!  Nothing that a little Heirloom White spray paint can't fix!  After a few coats of paint this little baby was looking MUCH better!


It looked really cute, but I thought it needed just one more thing... a little bit of "bling".  It's amazing how that one little gem added that final touch!


It turned out so nice that I made a set of three to put on a shelf. I think they look perfect.  Not bad for $3.00!


Cookie Cutters Become Decorations

While I was off of work on medical leave, I had no energy to do anything, but I started having "craft withdrawal"!!!  I'm always busy doing some kind of craft, but bed rest brought that to a screeching halt.  One day I was feeling good enough that I thought I would try working on a simple craft.  Now... what would it be???  Well, I happened to be in my kitchen getting something to eat when my eyes landed upon my box full of cookie cutters.  For some reason I looked at my heart-shaped cutters and thought... "I wonder what those would look like wrapped in twine?"  Doesn't everything look better wrapped in twine?  Well, it certainly would be SIMPLE, and wouldn't take very much energy, so why not give it a try?  I started out with a small dot of glue with my hot glue gun, and started wrapping.


Since I had two sizes of heart cookie cutters, and two different colors of twine, I wrapped the smaller heart with the darker twine. 


This is not necessarily the "final resting place" for these hearts, but until I find someplace I like better I think they look pretty cute.  Considering that you can purchase metal cookie cutters for about $.50, this makes a really sweet and cheap little decoration.  That was the end of my decorating endeavors for the day, and I quickly made my way back to bed.

I'm Linking Up To:

The Girl Creative

"Tweaking" My Bathroom Light

I cannot take credit for this idea - all the credit goes to my niece Amy, who just so happens to have the Design Intervention blog.  If you've seen her blog, you know she is one very talented young lady - if you HAVEN'T seen her blog be sure to check it out!!  She actually helped me come up with a lot of ideas, and has had to answer countless questions from me about whether or not something looked right. 

Anyway, on with the light.  I was in the process of making over my master bedroom and bathroom when Amy was here visiting her Mom.  I asked her to go shopping with me to help me find some things to decorate with - one of which were lights for my bathroom.  Needless to say, Amy jumped at the chance to spend MY money instead of hers, and did a VERY GOOD job of it (spend my money that is!!!!).  We went from place, to place, to place trying to find "just the right" light.  I had already installed a small chandelier over my garden tub, so she was trying to find something that would coordinate with it.  She was looking at details that I had not even paid attention to.  Finally she looked at this one light, and said, "stay with me here, cuz I have a crazy idea."  At that point I already knew it was probably something pretty cool, so I was all ears!  She recommended that I wrap the steel bars with clear crystal pearls.  GENIUS!!!  That little touch would make it match the features of the chandelier beautifully. 

Here is a picture of the chandelier (shown with close-up detail) over my tub.

So this is what I did to create my matching lighting.  These are the lights I bought.  You will see that the "metal portion" is just like that in the chandelier.  Amy also recommended that I purchase different glass/light bulb covers as well to make them match a little better.


Next I purchased a spool of the clear crystal pearls.  I placed a small dot of hot glue at the top of the bar and started wrapping the pearls around the bars.  As I wrapped I continued to use hot glue to secure the pearls and keep them tight on the bar.


I continued wrapping and gluing until all three light bars were wrapped. 


Added the lights covers...


and finally... installed them in the bathroom. 


Like I said... GENIUS!!!!  Aren't I lucky to have such a smart little niece?  Thanks Amy, your idea worked out beautifully!!

Vintage Photo Book Covers

Continuing with the "book" theme, I decided to try another quick and cheap technique with a set of books.  I know I saw a similar idea like this on someones blog, so I can't take total credit for this idea - unfortunately I can't remember where I saw it.

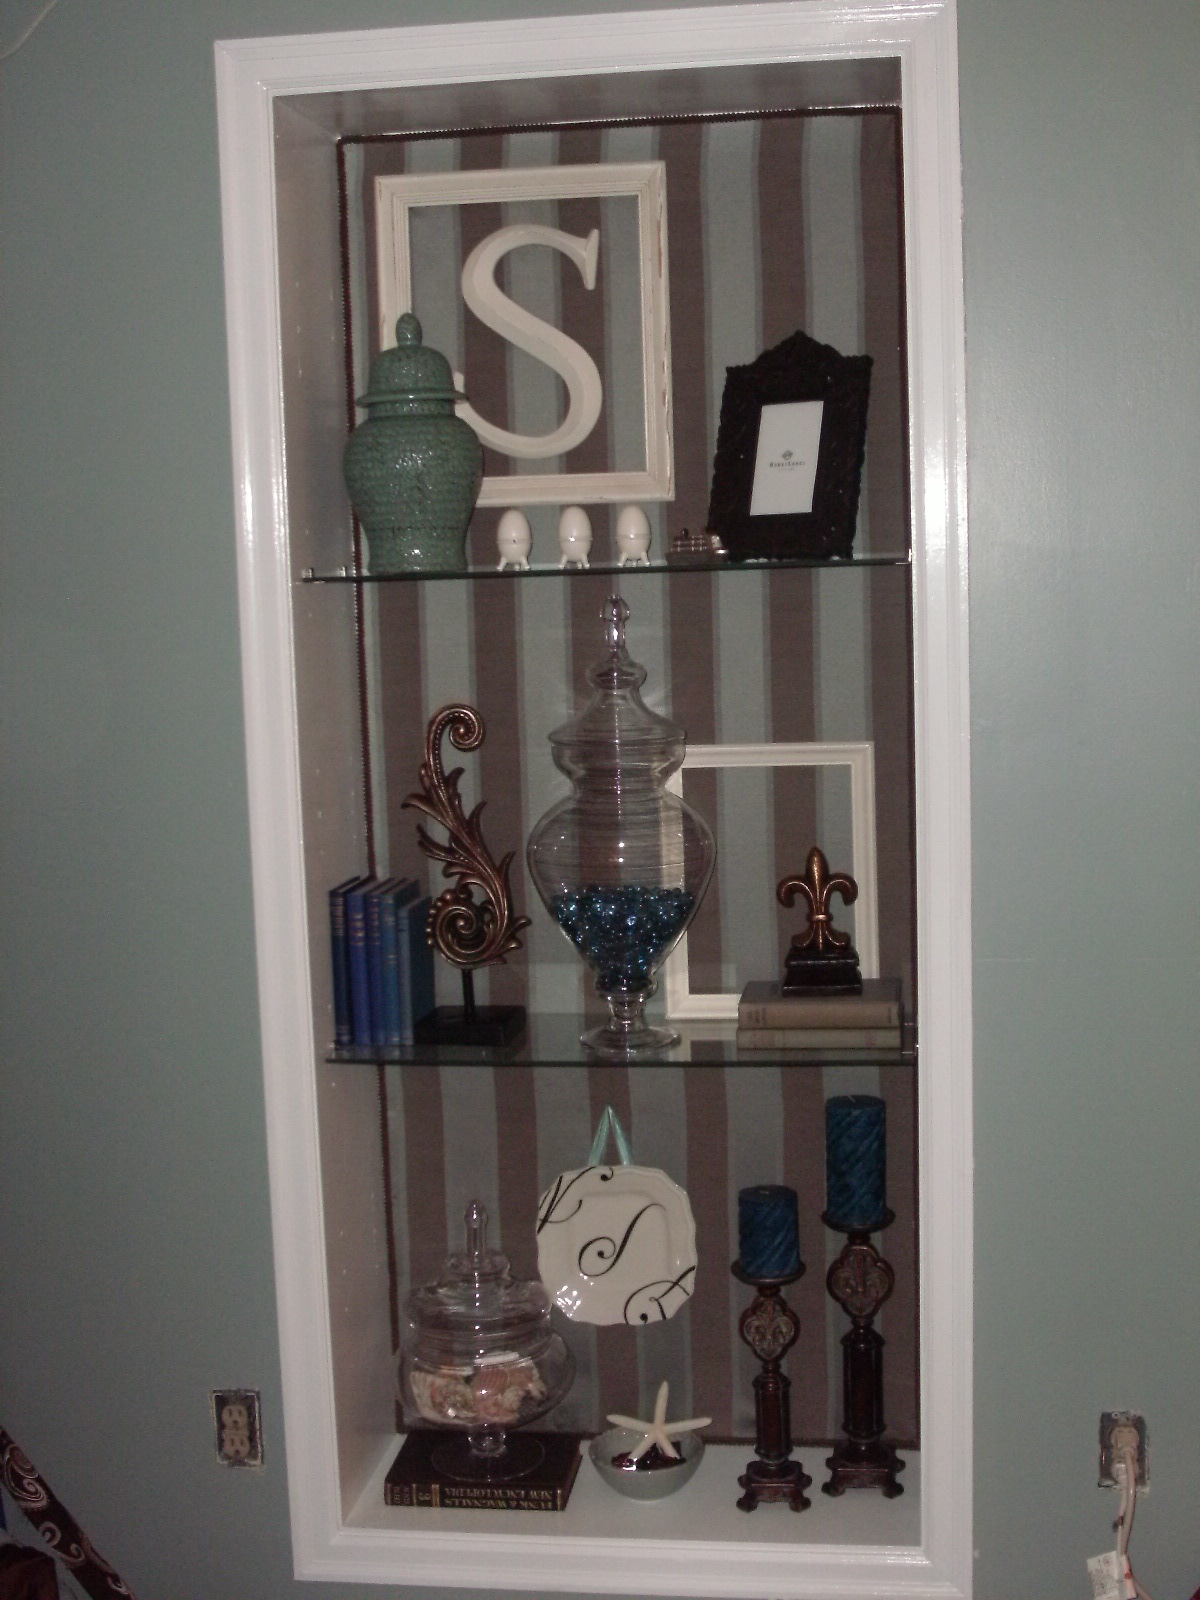
Anyway, I have a number of books that I have set aside to use when decorating.  I selected several different sizes of books that I thought would make a nice grouping.  Next I needed to find some old photos.  I wanted to use either black and white or sepia photos.  I eventually want to get some of my own old family photos, but I wanted to see if I even liked it before I went to a lot of work.  So, a-searching I did go (on the Internet that is).  I was able to find a site that had tons of old photos that had decent resolution.  I wanted to find pictures that could "feature" a portion of the photo that would appear on the spine, with the rest of the photo wrapping to the front and the back of the book.  Once I had some pictures I thought I could use, I measured the sizes of the covers and spines.  I do all my graphic design in Corel, so I created a book cover to match the book size and imported the photo.  I carefully placed the photo in the appropriate place on the spine and printed it out on 12 x 18 paper.  I then made a book cover (just like we had to do with old paper bags in school - don't even tell me you're too young to ever have done that!!!!), and wrapped my book with the new photo cover.  It doesn't really matter that the photo does not go all the way to the edges of the book, because all you will see is the spine. 

I LOVE these covers - not necessarily the pictures themselves, but the idea and especially using the muted colors.  I can't wait to find and scan some of our old family photos to use instead of using pictures of people I don't even know.  Keep in mind, the wider the spine of the book, the more you will see of the photo you are using. 


Friday, June 25, 2010

Uncovered Book Bundles

I was recently walking through a mall and went into a store I had never been to (or even heard of) - Restoration Hardware.  What an awesome store!  Unfortunately...Waaaaaay out of my price range, but awesome stuff none the less!  Anyway, as I was wandering through the store, and lusting after many of their items, I came across a very simple item and thought, "Hey!  I could make that!!!"  It was a stack of books that had their covers removed!  Yep!  That's all it was... all for the low, low price of $29.00!!!  YIKES!!!  Would someone really pay that much for 4 old books with their covers ripped off??  In their catalog they are listed as "New - Set of 4 Antiques Uncovered Book Bundles".  Here are a couple of pictures I took with my phone camera (on the sly of course) in the store.
Anyway, it didn't take me very long (like maybe 2 seconds) to figure out that I could make a fairly good reproduction of this lovely item.  I probably have some old books around the house that I could use, but instead I decided to make a quick trip to our local Goodwill store and rip apart some books that I don't care about.  I checked their book selection carefully.  You want to get "older" books, perhaps even a bit "yellowed".  One thing that is important... you need to make sure the cover can be completely removed - especially from the spine, and will leave a "textured" spine.  I was so excited to get started on this (very COMPLICATED) project that I forgot to take pictures of the work in progress, but I think you can probably figure it out all by yourself.  It took me about 5 (very exhausting) minutes to rip apart carefully remove the book covers and tie them up with some twine.  I have some old tags, so I tied one of those on as well and added a stamp on it to finish it off.  

Total cost?  $5 for the books.  Total savings?  $24... not including tax!!!  Whatcha think?

Mine... 


Theirs...

I don't think I did to bad.  PHEW!!!  That was a tough one!!!

Long Time No Post

Geeeeeezzzzz, it has been a LOOOOONG time since I have posted anything, but it couldn't be helped.  (Not that anyone missed my postings since I don't really have a following, but hey, someday people may go back and read these posts!)  I just started back to work after 7 weeks of bed rest.  I was diagnosed with CMV (a cousin to Mono), and was told to go to bed and do NOTHING!!  I wasn't even allowed to be on the computer - that was tough!!  I followed "doctor's orders", and am finally starting to feel a little better.  I hope to start posting some of the things I was working on before I was laid up.  I hope to start working on some of my larger projects real soon, but I know I have to take it fairly easy for a while yet, but I'm itching to get back at it.